Getting Started
Private Server
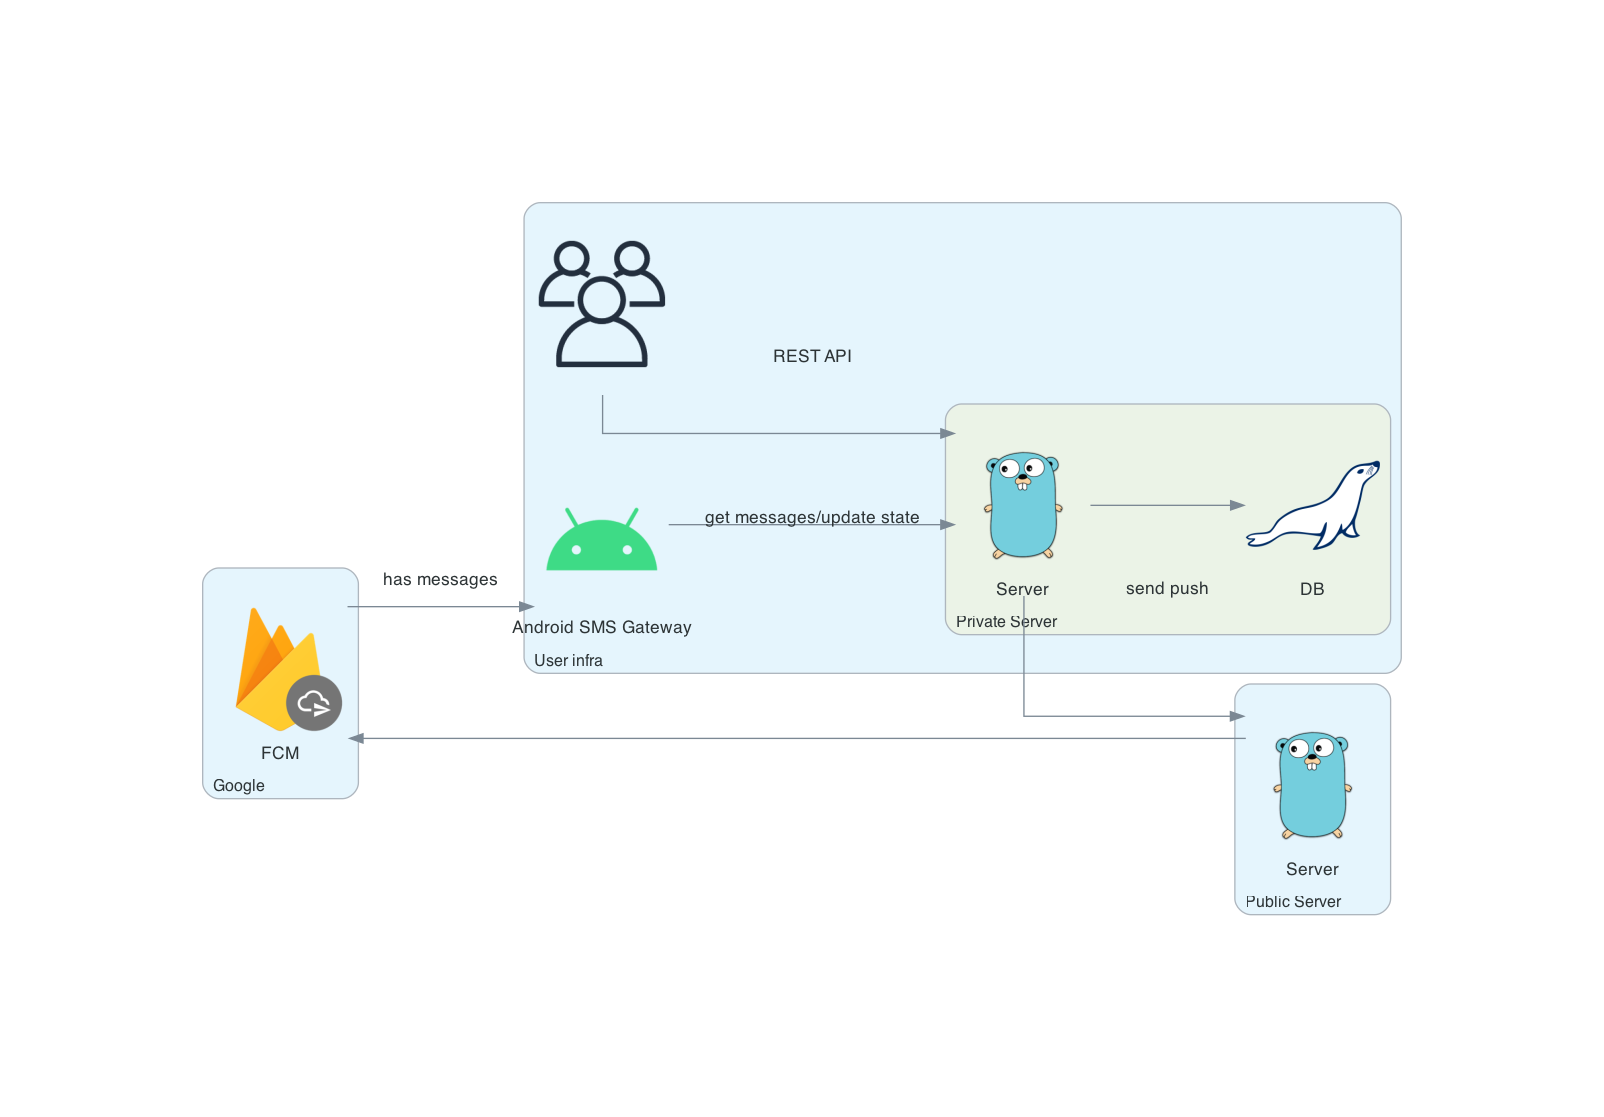
To enhance privacy, you can host a private server within your own infrastructure, ensuring that all messages remain solely on devices you control. The only required external network connection is for sending push notifications via the public server at sms.capcom.me. This setup eliminates the need to configure Firebase Cloud Messaging (FCM) or rebuild the Android app, but it does demand some technical know-how.
Prerequisites
- A MySQL or MariaDB database server with an empty database, and a user granted full access to that database.
- A Virtual Private Server (VPS) running Linux with Docker installed.
- A reverse proxy with a valid SSL certificate and HTTPS enabled.
Run the Server
- Create a
config.ymlfile based on the template provided in config.example.yml. Pay special attention to thedatabase,http, andgatewaysections. Environment variables can be used to override values in the config file. - Set
gateway.modetoprivate. - Define
gateway.private_tokenas the access token for device registration in private mode. Ensure this token matches the one on the devices set to private mode. - Start the server in Docker with the following command:
sh docker run -p 3000:3000 -v $(pwd)/config.yml:/app/config.yml capcom6/sms-gateway:latest - Configure your reverse proxy, enable SSL, and modify your firewall settings to permit Internet access to the server.
Refer to the server's README.md for more information.
See also:
- Installation Example with Ubuntu, Docker, and Nginx Proxy Manager
- Docker Compose Quickstart for Single File Deployment
Configure the Android App
Note: Changing the server will invalidate current credentials, and the device will be re-registered with new ones.
- Navigate to the Settings tab.
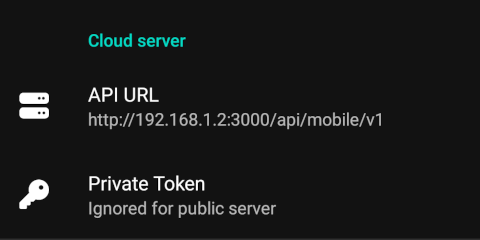
- In the Cloud Server section, enter the API URL and Private token, ensuring they match those in the server configuration. Note that you should include the full URL with the path, such as
https://private.example.com/api/mobile/v1. - Switch to the Home tab.
- Activate the Cloud server option.
- Apply the new configuration by stopping and starting the app using the button at the bottom of the screen.
If everything is configured correctly, the new credentials for the private server will be displayed in the Cloud Server section on the Home tab.